
DIY "Milk Carton Basket" No Glue part 3
Continue Weave "Milk Carton Basket" No Glue part 3

Weave the front and the side part together.

B. and C. will be the bottom of the "Milk Carton Basket"
(You can weave bigger as you need)
(You can weave bigger as you need)

Fold A. up as the front of the "Milk Carton Basket"

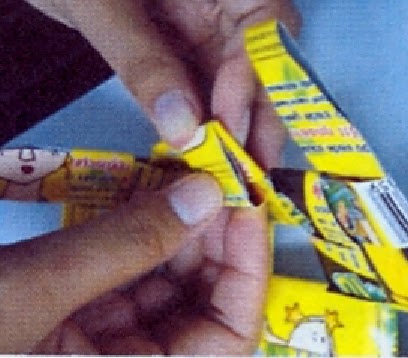
Fold the "loop" B. up, mark it as 1. (See the next picture)

Put a new strip (2.) in 1.
Then slip A. through 1.

After tuck them all, keep one new strip.

Put the loop of new strip in left side of 2.
and slip the excess tip through A above.
and slip the excess tip through A above.

From last picture above, you already weave first set of the side.(S.1)


Continue to weave full side of the "Milk Carton Basket"

Slip S.1 through C.......(repeat the same step)


Weave around as you need the basket size.
fold and tuck it inside the milk carton basket.


And there you have it! A recycled "Milk Carton Basket"
You can also weave the bigger size
and insert the ribbon between the hole for carrying.
Choose, collect and create a colorful pattern, then make your own!

Although toilet paper rolls are rather rough, no colours.

But easier find and no odors.

Futhermore, I made the baskets from old magazines, not milk carton
just similar but not the same as originl method.
If you interested, I will post this tutorial soon.
just similar but not the same as originl method.
If you interested, I will post this tutorial soon.

This tutorial is rather difficult to compose for me, new blogger.
I love hearing from you, so please leave a comment or some advice
You're welcome to use my content if you link back
and credit http://diyhowtodo.blogspot.com as the source. Thanks!

8 comment